Wednesday, September 28, 2011

Shi No Numa Strategy Guide

New Characters
Shi No Numa will be the first map to have profiled characters. What that essentially means is you know who you are playing.The developers have first time made all factions working together to fight for the survival Yes! American, Russian, Japanese, German all of these guys will be fighting together to survive in the menacing zombie swamp.
Depending on the order of the players (player 1, player 2, player 3, player 4), you will be assigned one of these factions. Most probably player 1 will be American, player 2 will be Russian,player 3 will be Japanese, and player 4 will be German.
And about the profiles of these soldiers, Tank Dumpsey, is the American hero first in the line up, Nikolai Belinski, a Russian soldier is the second, Takeo Masaki, the Japanese commander is third, Doctor Richtofen, the German doctor is the 4th and the last one in the line up.
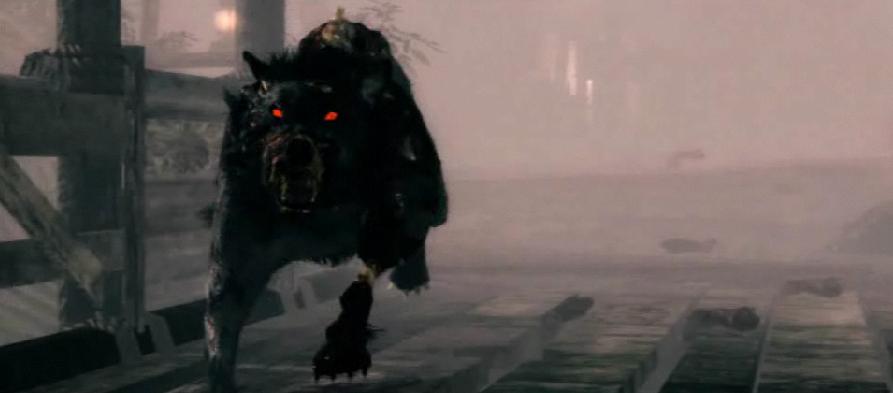
Flaming Hell Hound Shi No Numa
Flaming Hell Hounds
One of the most crazy bastards you gonna face in this map are flaming hell hounds, these are the dogs that can explode, much more like a suicide bombers arggg.
After round 7 frequency of hell hounds spawning in place of zombies increases, they most likely hold 50-50 chance against imperial Japanese zombies and believe me that makes things more then just worse but, the relief is that they never spawn within the same 3 rounds. There is a nice little hint indicating their arrival, there is a loud explosion and fog grows thicker.
Map Guide
You spawn in the main building on the second floor and soon start to find your way to the first floor. From the first floor you can go to four other buildings, The Common RoomThe Fishing HutThe Doctor’s Quarter and The Storage. Each of these rooms have a perk machine but which perk machine it would be, is random.
You don’t need electric power in this map to use either. You also have the access to the flogger from the main building, near the way to the fishing hut.Each of these rooms have electro shock defenses which can be activated with 1000 points. More on it as we play  Shi No Numa and discover new things.
Shi No Numa Map Guide
Strategy Guide
Shi No Numa is a very intense action map so the basic strategy here should be to move around while killing the zombies not to camp and sit on one spot waiting to die. The gameplay has been improved in a way that it forces you to move around the map or get killed.
Cute teddy bear shows more often in Shi No Numa then it used to be in Verrukt, and the places it shows up at are random and unpredictable.
To stay alive you need to put a good fight and stick together till round 6 with team work, use team speak to coordinate with each other while playing the game because it is way too important for this map.
You need to time your reloads, cover each other, timely reloads will count and make you and your friend less vulnerable to zombie attacks. Use bouncing betty’s and Electro shock defenses whenever needed, when going for perk o cola machines, make calculated trips.
A zipline from the main building second floor to the doctors quarter is also active and could be used as a quick escape,but only use it if you are already in a worse situation because believe me there are lot more zombies in there then you can possibly anticipate.
At beginning use the basic 5 shot to knife strategy to get points, at around round 4 unlock one of the ways downstairs. Unlock the door if you want to camp downstairs or the stairway if you are going to camp upstairs. After the dogs have appeared the mystery box has already exploded and you can see it by looking into the sky.
It looks like a large beam of yellow sines down, the basic strategy here should be to move along with the box, finding good camping spots on the way.

OR open the stairs only, then go to the next door, have 2 people defending the stairs and 2 player watching the windows.When possible activate the zipline door and buy some betties.As a good measure against the hell hounds plant bouncing betties all along the zipline area. Try to activate the flogger when possible and then head back up the stairs to keep some pressure off you.


Shi No Numa Solo Strategy
When you are playing solo you are always American, some guy at codforums figured out this good strategy if you are going solo for this map. It’s quite hard map, and one of the worst things about it is, it is the largest of all so you need to be quite persistent if you are going alone in this one.
Buy arisaka and run around until round the beginning room until round 3, it will be quite tough round for you but if you survive this round you are guaranteed to have an insta kill.
After that open the door not the stairs, you should have 2800-3900 points as of now.Buy a Thompson or one or two other good guns and hope for the best. There is a room next to the mystery box which can be opened for 1000 points to get to the common room, don’t open that.
Most of the zombies will come from outside which is straight ahead so you need to focus this area more then your right or left flanks which will have lesser share of zombies.
When the hell hounds start coming, quickly move to the place at left from where the zombies come, there is a little alcove with a window, take cover there.No need to worry dogs never come from the window.
Some of the dogs on fire can explode creating a smoke that blinds you, so moving around in that little alcove will be helpful. At this round the dogs are week so magnum is one shot kill but try not to use bold action rifles.
There are only few dogs and when you kill the last one, you get max ammo. Now go back to the place by the common room, keep killing and buying more weapons eventually getting a cute teddy bear. At round 12 you will have more dogs to fight, follow the same strategy and you will have no problems.
At round 13 you will complete“Fertilizer Man” achievement which is for killing 200 zombies. If you get overwhelmed by zombies try to make your way to another door but not the common room as it will ruin all the strategy if you go there.
If you have to open the common room, don’t get to the left house as you will be cornered  there. Although it could be a good strategy to hide out in there.You can go up to level 14 at least using these simple steps.


Read more: http://segmentnext.com/2009/06/12/shi-no-numa-strategy-guide/#ixzz1ZFKqLU8m


Wunder Wafffe DG-2


WunderWaffe DG-2
Wunder Waffe Die Glocken 2 is a weapon developed and tested in Poland during the World War 2 but never saw action due to reasons we don’t know but what matters is, this baby is way too deadly for any undead or living creature. WunderWaffe DG-2 is a kick ass gun with small clip size 3 bullets only, and 18 bullets total at your disposal.
One bullet of WunderWaffe is so deadly that it amazingly travel from zombie to zombie killing them all just like that. It is a large gun so it has a slow reload time and the fact that it can backfire if you fire too close to wall by stunning you with electricity demands that you use it carefully. The worst part about WunderWaffe is Shi No Numa Is that only one person can use it, and it is found in the random box.
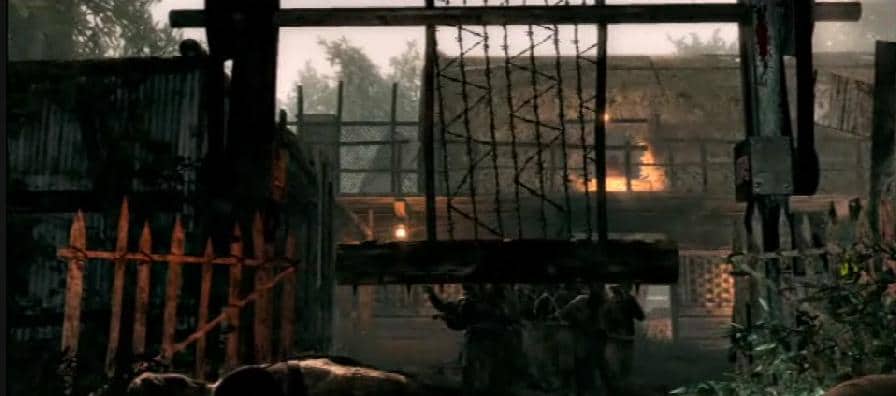
flogger Shi No Numa
New Traps
Another new feature the Shi No Numa has is the introduction of the flogger, a flinging catapult sort of trap that has two spiked logs, it spins and kill zombies and can be set up for 750 points, its another tool for survival in the open and the best part is, you can crouch/prone under it to move to the other side.
New Gameplay Changes
No more Camping buddy! You have to move around a bit in Shi No Numa, cos if you don’t you will get yourself in trouble. You might have figured out the frequencies/places at which cute teddy bear shows up more often in Verrukt but you won’t be able to guess that in Shi No Numa because it shows up randomly at different places, even the one you haven’t bought yet.
This type of gameplay has been implemented to make people play more active game rather then just sitting tight in one place. To survive you have to stick together and make timely trips for reload because you won’t have enough time this time. It’s an intense action map so everything you do, must be calculated. More will be up on this one as we go through the map.

Der Riese Info and Strategy

If you think Verrukt was bad, and Shi No Numa really pushed you to your limit then embrace yourself with more  intense gameplay of Nazi Zombie Map “Der Riese” recently released by Treyarch. You can’t blame them for keep on working on the zombie part of the World at War because you are partly the reason for them doing that.

I mean, 1 million downloads on the first day of release of every freaking zombie map, wtf? And then people say “Enough Zombies FGS”. Well that’s not strange, as always critics and freaking gamers don’t go the same path, it has been proven many times, with  some games getting the poor rating and still becoming the most played games over the weekend.
Hilarious? anyhow “Der Riese” another zombie installation in the popular Call of Duty World at War zombie mode has been around for weeks now and has proven to be rather mysterious for everyone. Lot of gameplay changes, new machines, new guns, and storyline mysterious as ever.
Der Riese means Zombie factory, it’s a former secret Nazi research facility, now turned into zombie paradise. It features the Pack a Punch machine, a device capable of upgrading your weapon with a touch of a button. The map is connected by teleporters to move from one place to another and in times these teleporters will be very crucial for surviving zombies and hell hounds.
What’s New in Der Riese?
There are lot of new interesting things in Der Riese that were not present in previous zombie maps, Verrukt and Shi No Numa.
Carpenter 
Carpenter is new power up added in this map, it appears as a hammer and instantly repairs all the windows of Der Riese map, in turn slowing down the zombies and giving your team enough time to regroup.
Bowie Knife
Bowie knife is an all new weapon featured in Der Riese and does the one hit kill till round 19 with an ability to do much damage in the later rounds as well. It’s a bad ass weapon to survive in times when you are out of ammo. It is found after opening the door leading to Teleporter C and will cost you around 3000 points.
Monkey Bomb
Monkey bomb is a type of secondary weapon, a sort of toy mounted with grenade. It is alternative to your secondary grenade with 3 held at a time and refills with max ammo power ups. It is found in mystery box and attracts all zombies around him before detonating and destroying everything in its area of effect. But the most noticeable thing is that it requires several seconds to pull it out and throw it, making it a slow weapon so use it intelligently.
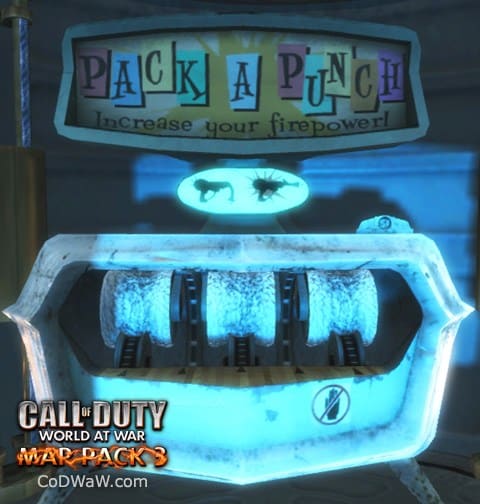
CODWW_PackAPunchPack a Punch Machine
Pack a Punch Machine is the new upgrade machine featured in Der Riese Zombie Map. The concept is the same as of Perk a Cola Machine or Mystery Box but Pack a Punch machine actually upgrades your weapon in hand and in a way enhance it but it doesn’t necessarily upgrades every weapon, the weapon should be compatible, meaning Pack a Punch machine supported weapon, but it allows majority upgrades of weapons found in Der Riese.
You can use  Pack a Punch machine if you have electricity on, all three teleporters are linked to the mainframe, a compatible gun and cost of upgrade which is 5000 points.
The upgrade effects of Pack a Punch machine on weapons are still questionable but here is the list of weapons that we know and the upgrade effect of Pack a Punch machine on them.
Pack a Punch Weapon List
.357 Magnum: Name changes to “.357 Plus 1 Kil-u”, and has increased damage.
M1 Garand W/launcher:Name changes to “The Imploder”, has 4 extra rounds in magazine, 3 more grenades to launch, so considerable increase in ammo capacity.
BAR: Name changes to “The Widow Maker”, has extra 10 carried ammo, 10 rounds per magazine, and increased ROF.
Browning M1919: Name changes to “B115 Accelerator”, has devastating fire rate with 250 extra carried ammo.
Double Barreled Shotgun: Name changes to “24 Bore Long Range” and has increased range.
Sawed-Off Double Barreled Shotgun With Grip: Name changes to “The Snuff Box” and the upgrade effects are still not known.
FG42: Name changes to “420 Impeller”, extra carried ammo with increased magazine size.
Gewehr 43: Name changes to”G115 Compressor”, and now has more ammo and increased damage.
Kar98k: Name changes to “Armageddon” increased magazine size and do more damage.
M1 Garand: Name changes to “M1000″ and has increased ammo.
M1 Thompson: Name change to “Gibs-o-matic” has increased ammo, magazine size, and damage.
M1911: Name changes to “C-3000 B1AT CH35″ and becomes a grenade launcher with 6 rounds per magazine.
M1A1 Carbine: Name changes to “Widdershins RC-1″ and becomes fully automated.
MG42: Name changes to “Barracuda FU-A11″ and has 250 more held ammo with an increased fire rate.
MP40: Name changes to “The Afterburner” and now has extra 32 rounds per magazine.
PPSh-41: Name changes to “The Reaper”, has increased magazine size with 345 extra carried ammo.
Ray Gun: Name changes to “Porter’s X2 Ray Gun”; magazine size is doubled with reduced splash damage, and now fire a red beam instead of green.
M2 Flamethrower: Name changes to “FIW Nitrogen Cooled”; allows quicker movement, increase damage, cools down faster and uses less heat initially.
Wunderwaffe DG-2: Name changes to “Wunderwaffe DG-3 JZ”; magazine size and stored ammo doubled, fire spread increased to 20 zombies, no longer requires direct hit, and can kill you.
Trench Gun: Name changes to “Gut Shot”; 10 shells in magazine, now reloads 2 shells at a time, and has tighter pellets spread.
Panzerschreck: Name changes to “Longinus”; has extra ammo, holds 3 rockets at time, and is semi automatic now.
PTRS-41: Name changes to “The Penetrator”; 8 rounds per magazine, more penetration, and increased range when scoped.
Type 100: Name changes to “1001 Samurais”; increased ammo, magazine size and fire rate.
STG-44: Name changes to “Spatz-447″; 30 more rounds in magazine, 120 extra carried ammo, and more damage.
Type 99: Name changes to “The Eviscersator”; upgrade effect not known but Fly Trap needs to be activated for it to be appeared in mystery box. No one has been able to get Type 99 yet.
Mystery Surrounding Type 99
Whether you have started Der Riese Nazi Zombie Map or have been playing non stop, it’s an annoying fact that Type 99 is still to be found. No one in the gaming community has got his hands on this mysterious weapon yet. Considering the seriousness of the situation, here are the few facts that we know about Type 99.
We all know that by triggering “Elevate your Senses” achievement, it starts a mini game where you have to find certain objects scattered all over the map. After you have successfully recovered all these objects, Type 99 should appear in the mystery box but that hasn’t happened yet.
Gathering data from all over the gaming community, it’s safe to say that the objects found by most of gamers were “Teddy bear holding a bowie knife” (located at the main frame on the window ledge to the left), “Teddy bear with juggernog bottle” (located inside the animal cage by the trench gun) and “The Monkey” (located inside the furnace by the Thompson).
There are two of these Monkeys that make the total hidden objects 4 (Teddy Bears x2, Monkeys x2).
Rumor has it that if you have recovered these objects then Type 99 should appear in the mystery box but that’s a big IF, you know. As far as Treyarch is concerned, they released this mysterious weapon in the Pack a Punch Machine Weapon List so there is no denying that it exists for sure.
It’s either as if there is another object to be found after activating “Elevate Your Senses” mini game or it’s an error in the game at Treyarch ends, either way it’s a mystery not resolved yet. Got something about Type 99? Share with us in Comments.
How to use Fly Trap to Activate “Elevate Your Senses”
Der Riese Achievements/ Trophies
Elevate Your Senses- To get this you must have a weapon that has been upgraded through pack a punch machine. It won’t work unless the gun is upgraded. Follow the video tutorial to find it. Anyway if you for some reason can’t find it, face the pack a punch machine, open the door on your right and it’s a window opening on the left.
Locksmith – There are total of 9 doors in the map, open all the doors to get this trophy. Well it isn’t that difficult. All of these will be open, once you have linked teleporters. If you have trouble finding all of them, search around a bit during early rounds along with your friends and you will be able to open them but only in early rounds so that you don’t meet much zombie resistance.
40 Knives – Get a Bowie Knife and kill 40 zombies with it and that’s it.
Der Electrician – To have this trophy, you need to link all the teleporters before round 7.
Frequent Flyer – This trophy is rather easy to get, just use teleporters atleast 8 times and you are done.
Wacker Packer – You will have this trophy when you upgrade your weapon with Pack a Punch machine for the first time.
The Might of the Monkey – You will achieve this trophy when you will use “The Monkey Bomb” for the first time.
Perkaholics Anonymous – Get this trophy by surviving till round 20 without buying any perk.
Acquire Waffle Weapons – Obtain the Ray Gun, Wunderwaffe DG-2 and the Monkey Bomb at the same time in a game to achieve this trophy.
Pack Addict - Upgrade 5 weapons at the Pack-a-Punch Machine to get this baby.
Few Notes
FG-42 is a weapon that now can be bought of the wall for 1500 points.
Zombies can now climb certain ledges and fences.
Mystery box once again is pointed by a trail of light from the sky. This time however the light is blue and comparatively harder to spot.
Der Riese Map Guide
Well layout of Der Riese is somewhat larger then the previous two zombie maps Verrukt and Shi No Numa, for the starter it may seem huge. Patience is recommended while playing this map, you will get used to it after several rounds of continuous gameplay.
The vast train will force you to focus on team work more then ever, relying on each other for watching your back is more then necessary now. Anyway we have a good enough Map guide to get you through the basics so read carefully comrade.
CODWW_MP3_DerRiese_Map
Der Riese Rooms
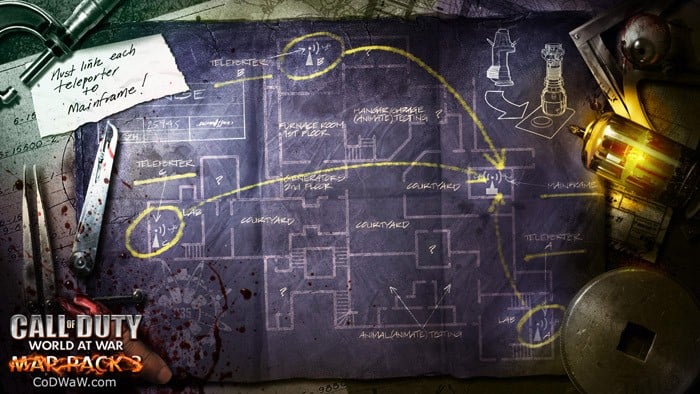
There are several rooms in der riese, the starting room is just outside the factory. There are barricades against the zombies, two either side of each, one to side of power generator and one down to the doorway. There are two rooms that lead outside the starting room and the pack a punch machine is just behind the main frame.
Right Factory Room
after opening the door on the right, you will see a barricade containing a double barreled shotgun and a door that leads to a different room. Watch out for the railing above, from where the ugly zombies can jump down from, there is also two brick walls in the room that should be taken care of. When you switch on the generator, this room gets connected to the left factory room as well as the Mystery box spawning room.
Right Hallway
after opening the door that leads out of the right factory room, you get in to the right hallway. This is where you will find a staircase leading towards a box, where you will find few barricades and Thompson.
Left Factory Room
after opening the door on the left, you will find a barricade guarding an ally and a locked door. When the power is turned on, this room gets connected to the right factory room and the mystery box spawning room.
Left Hallway
after opening the door that leads out of left factory room, you will end up in left hallway. It has trench gun and two barricades. There is a staircase leading to a box barricade and another locked door leading to teleporter 2 room.
Teleporter 1
You will find a locked door to the right balcony of mystery box spawning room that door leads to the room containing one of the teleporters as well as the mystery box spawning point. There is also barricade in this room.
Teleporter 2
Open the locked door in the left hallway, and you will enter a room with yet another teleporter. There is also a barricade here that requires our attention because zombies can access this one. If a player goes up to staircase in this room, he will be able to clearly see a balcony type wall, from where they can shoot down zombies entering first room. There is a barricade in this balcony type room which also contains a mystery box spawning point.
Mystery Box Spawning Room
Open either of the box barricade in either hallway and you will end up in a balcony, an area just outside the factory. You will find juggernog placed to the left of the boxes on the left side. Now if you jump off the roof, you will come across mystery box sitting next to the power generator.
You will find doors leading to teleporter 3 and teleporter 1. The double tap root beer can be found on the right side of the balcony. When the power is turned on, a bridge folds down connecting the two balconies and the room connects with the left and right factory rooms.
Teleporter 3 Room
Open the door in the mystery box spawning room and that will lead you to a building in the factory. You will find a bowie knife placed at entrance of that building and inside it, lays the final teleporter. You will find a set of stairs, mystery box spawning point, a cave and a balcony here.
The balcony in question is just outside the building and can be used to shoot down the approaching zombies. You will find a barricade behind the balcony. There is door here that leads to another room with quick revive.
Why Electricity? 
Der Riese just like Verrukt is electricity dependent, and there are lots of things that require electricity to be switched on. Let’s say to link teleporters, open certain doors, and to use Perk a Cola machines, and Pack a Punch Machine.
Use of Teleporters
To link the teleporter, you need to approach the teleporter, and hold action button. Once you do this, a timer will appear for 30s and within that time you need to return to the spawn room and link it to the mainframe. Pack a Punch machine requires all three teleporters to be linked to the mainframe. When they are linked you can teleport from one node to mainframe never vice versa or to another node.
After many teleports, sometimes an evil girl announcer will say “uh-oh” and no power up will be dropped. It is then possible for a hell hound to appear, it’s not yet confirmed whether you need to activate fly trap first before this can happen. If you know anything about that, share with us.
Der Riese Strategy
Der Riese is a large map as compared to its predecessors so sticking together as a team and communication is more then important now. Your success lies on these two factors which will decide the outcome of the game. The more cohesive and communicative you as a team, more chances of survival you have.
As the zombies are far more deadly then before, their attack power and high speed has forced us to prefer juggernog and speed cola to save our skins from the advancing hordes of zombies and upgraded hell hounds.
Now linking up teleporters before round 10 should be your top most priority or you won’t survive in the later rounds. Try to grab a decent weapon off the wall or mystery box and hopefully with juggernog, you will have more chances to survive when you connect all teleporters and move on.
Most important tip in surviving is to not to rush for perks or teleporters in the heat of rounds. Wait for the wave of zombies to slow down near the end of the round, either make them slow crawler by throwing a nade or trap a zombie behind a window with one member baby sitting the zombie while others getting all  the perks and whatever they want with ease.
Once you have linked up all the teleporters and have access to pack a punch machine, that’s where the game finally begins. You can either camp in the teleporter rooms to fend off oncoming zombies specifically the warehouse holding teleporter C can be used as a barricade against zombies.
Fetch some MG’s to cover the ground floor while others man the upper window and take care of the stragglers. Still with all these tips, you can only survive team work and good communication in the later rounds.